 Chip has installed the new cylinder head on the TR6 in preparation for another dyno run. He also painted it black to match the rest of the motor. Once he gets the new numbers, we’ll report back.

Chip has installed the new cylinder head on the TR6 in preparation for another dyno run. He also painted it black to match the rest of the motor. Once he gets the new numbers, we’ll report back.
As part of the TR6 tuning process, Chip has sent an old TR6 head out to be cut down slightly and flowed. Once he swaps the head onto the motor, he can report the difference on the dyno between the old and new. We’ll have the exact specs for the new head so everyone can evaluate it to see if it’s worth it for their particular situation. Pics of the head as it came back from the machine shop.


 The machine shop reported some nice improvement on the flow bench, so we’ll see what it gets us at the wheels.
We are in process on a TR4 that is in the shop. The latest order of business was to check out the extent of some rot in the battery box area. As you can see from the photo below, some new metal will be necessary.
 After we converse with the owner, we’ll commence cutting out the old to put in the new. The front suspension on this car has already been rebuilt, and the motor is almost ready to go as well.
Chip noticed some squeaking in the front end of the project TR6 and decided to replace some bushings in the front end with Richard Good Nylatron bushings.
 Above are the offending squeakers.
 This photo shows the new bushings install on the lower control arm. Chip also inverted the control arm to lower the car a bit. This car will also get Spax shocks on the front and new springs. After all of that, we can get it off the rack and note any improvement.

 Thought I’d introduce another tool Chip is using to tune the TR6. It’s a software program that plots the Air/Fuel mixture ratio using a sensor mounted in the exhaust. This little tool helps to see how close we are getting to complete combustion. If anyone is wondering, we are currently a bit rich, so we can lean it out a bit. Our formerly weak ignition (see the previous article discussing Distributor Phasing) needed more fuel, whereas the properly functioning ignition requires less. We like efficiency.
 Ignition what? Read on, I’ll explain.
Adjustments continue towards the goal of maximizing the efficiency and response of the stock tuning on the ’76 TR6. Chip wants to get the car running as well as possible to serve as an accurate baseline prior to making any improvements. The latest adjustments were motivated by a miss that developed after a long highway run.
Chip went to a meeting in the Fredericksburg, VA area that facilitated running the non-overdrive, 4-speed TR6 an extended period of time on Interstate 95 at moderately high revs. The car ran well on the trip up. On the return trip home, an intermittent miss developed, leading Chip on a search for the cause.
It turns out that while the timing on the car was set correctly (the plug fired when the piston was at 10 degrees Before Top Dead Center with the vacuum retard disconnected), the spark was weak because the rotor was not lined up where it should be at firing time (it was out of phase). Take a look at the picture below for an explanation and please forgive the crude labels.
 In the picture above, the distributor cap is off. The black dot is the location of the #1 cylinder contact location when the cap is on, so that’s where the rotor should be at firing time, just like it is in the picture. The distributor in the picture is phased correctly (now). Prior to the fix, the rotor was about 20 degrees past it’s intended firing position, which made an awfully long arc for the signal to jump.
In order for the distributor to fire correctly, the rotor should line up with the cylinder contact at the same time the optical sensor (see picture) lines up with the break in the wheel. There are six breaks (one for each cylinder). The optical sensor is facing away from us and towards the center of the distributor.
 Above is a picture of the distributor from the other side (optical sensor is now at the 12 o’clock position) without the rotor. It’s a tad out of focus, but it helps to see how the breaks line up with the optical sensor. Now, let’s go back to the other side and look at one last thing.
 The picture above shows the distributor with the cap removed. We had a different rotor on at this time, so that’s why it’s not the blue one. The yellow arrows in this photo point to the adjustment available. Previously, the rotor was rotated a good 20 degrees counterclockwise (yellow arrow “Prior Position”) from where it is now, which resulted in it being a good ways past the dot marking the number one cylinder contact. Since everything didn’t line up like it is supposed to, the spark was weak.
Weak spark or not, the car ran fine for a while, a testament to the strength of the ignition. Eventually, however, running at over 3000 r.p.m.s for an extended time caused one of the spark plugs to go bad, which caused the miss Chip was hearing.
Credit for help in the diagnosis goes to Jeff Schlemmer of Advanced Distributors. Chip has sent numerous distributors to Jeff and has been very pleased. Jeff commented that he has seen phasing effects increase in prominence with the advent of electronic ignition retrofits to older cars. Jeff is a wealth of knowledge and well worth a call if you need a distributor resource.
So here’s the bottom line: when all of the ignition components weren’t lining up correctly, it caused problems with the ignition (bad plug) that led to a miss. Once Chip corrected that, the car runs like a top… which is what we’re after. Now that the car is running well, we can experiment with the effects of advancing the timing to 12 or 14 degrees BTDC. We’ll keep you updated.
Chip ran across a 1976 TR6 that had been sitting for a number of years. I think 7 is the number, if I remember correctly. The clear coat is peeling off, making the car look neglected. Chip saw some things he liked about it, however, such as the Panasport wheels and the fact that, other than sitting, it looked to be pretty functional. This would be a great moment to include a shot of the overall car if I had one, which, inexplicably, I don’t. I’ll put it on the list. (Click on any of the photos below to enlarge them).
 Here’s a shot of the front of our beauty queen. Somewhere along the way, someone installed an aluminum gas tank, which helps much from a corrosion standpoint. Chip removed the tank from the car, cleaned it, installed a new fuel line, cleaned the carbs, and it started after all those years of sitting.
 Above is the view during the gas tank cleaning. The tank was out of the car at this point and is pictured below.
 Future plans for this car call for some cylinder head work, a slightly more aggressive cam, and fuel injection. Stay tuned for further updates.
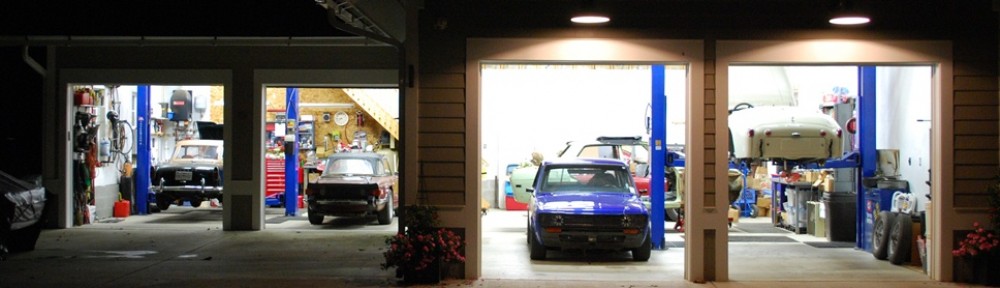
Most car folks love a nicely restored car and UK Motorsports is no different. If a car needs maintenance, maintenance it gets. If the owner wants a restoration, we can do that too. Below is a brief tour of a TR6 we restored.
[singlepic id=49 w=320 h=240 float=center]
Here we’ve got the chassis once we put the motor back on it and started piecing everything back together.
[singlepic id=43 w=320 h=240 float=center]
Here’s a shot with the body back on.[singlepic id=14 w=320 h=240 float=center]
Adding more accessories under the hood.
[singlepic id=12 w=320 h=240 float=center]
Interior coming along nicely.
[singlepic id=4 w=320 h=240 float=center]
Finished and back for a visit.
Perhaps you have heard of the common TR250/TR6 differential-mount weakness. We have repaired some of those and will try to illustrate the problem.
[singlepic id=63 w=320 h=240 float=center]
The above picture depicts the problem. Over the years, stress to the mount weakens it and it cracks. It’s a weak point. That split at the bolt is not supposed to be there. What we do is weld it back together and then add metal to box it in and make it stronger.
[singlepic id=64 w=320 h=240 float=center]
This picture shows how we get to the top of the mounting point without removing the body off of the frame. The stress on the mount causes spider cracks (or worse) on this side.
[singlepic id=67 w=320 h=240 float=center]
This last picture shows the mount (different TR6 in the picture) re-welded and new metal added on other other two sides to “box” it in and strengthen it. These mounts are great items to put on the checklist if you have or are in the market for a 250 or 6.
 This TR4 is from our own Dean Tetterton’s family. Dean became intrigued by the promise of precision fuel mixture control afforded by fuel injection, so he looked into the fuel injection kits for British cars offered by Rick Patton of Patton Machine. The improvements are in throttle reponse rather than horsepower, and I encourage you to read Patton’s explanation of the benefits here. Patton also makes mention of two completed TR6 conversions, one of whom reports regularly seeing over 30 mpg and another getting 28 mpg.
The necessary alterations include an electric fuel pump with 15 pounds of pressure, a fuel return line back to the gas tank, and four sensors. The sensors are a water temperature sensor, a throttle position sensor, a manifold air pressure sensor, and an O2 sensor in the exhaust. These sensors relay information to an E.C.U. mounted in the passenger compartment which controls ignition and fuel delivery. Let’s take a tour to see what the new parts look like in place. Double click on any of the photos to make them larger.
 Above is the engine bay after the complete installation. The adapters are the billet pieces underneath the carb lids. The injectors are standard GM parts in plentiful supply. The fuel pressure regulator is also visible just to the left of the left side air cleaner.
 A closer shot of the fuel pressure regulator.
 Above is a picture of the throttle position sensor, which is the black plastic piece in the center of the photo underneath the two hoses.
 This picture shows the Manifold Air Pressure sensor mounted on the firewall. It’s connected to a vacuum line that runs to the manifold.
 Above, you can see the required new fuel return line exiting the engine bay to run down along the passenger’s side frame rail and return to the fuel tank.
 The water temperature sensor screws into a bung welded into the thermostat housing for the TR4. TR6 conversions do not require a new bung, as they have an easier location to install the water temperature sensor.
 The distributor is now controlled by the E.C.U. mounted in the passenger compartment.
 The Check Engine Light mounted in place of the choke knob. Seriously, it’s real. Once the parts are in place, custom tuning is available and included in the kit price. Owners may drive their car with a laptop hooked up to the E.C.U. to collect data and then send the recorded files to Affordable Fuel Injection, who looks at everything and sends back refined files fine-tuned to your application.
The result is a well-controlled ratio of air to fuel at every rpm. In other words, your old British car responds to the throttle as precisely as all the modern cars you drive. Indeed, if all you know are modern cars, you may not appreciate the shortcomings of some carburetor systems. Dean reports the standard response from those who drive his TR4 is, “Wow.”
 Rear shot of the rare 1964 Triumph TR4 Fuel Injected model. Questions? Shoot us an e-mail or call. We love this stuff.