 Ignition what? Read on, I’ll explain.
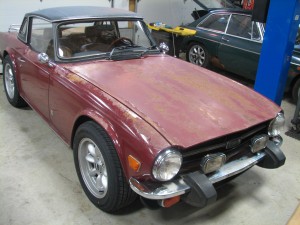
Adjustments continue towards the goal of maximizing the efficiency and response of the stock tuning on the ’76 TR6. Chip wants to get the car running as well as possible to serve as an accurate baseline prior to making any improvements. The latest adjustments were motivated by a miss that developed after a long highway run.
Chip went to a meeting in the Fredericksburg, VA area that facilitated running the non-overdrive, 4-speed TR6 an extended period of time on Interstate 95 at moderately high revs. The car ran well on the trip up. On the return trip home, an intermittent miss developed, leading Chip on a search for the cause.
It turns out that while the timing on the car was set correctly (the plug fired when the piston was at 10 degrees Before Top Dead Center with the vacuum retard disconnected), the spark was weak because the rotor was not lined up where it should be at firing time (it was out of phase). Take a look at the picture below for an explanation and please forgive the crude labels.
 In the picture above, the distributor cap is off. The black dot is the location of the #1 cylinder contact location when the cap is on, so that’s where the rotor should be at firing time, just like it is in the picture. The distributor in the picture is phased correctly (now). Prior to the fix, the rotor was about 20 degrees past it’s intended firing position, which made an awfully long arc for the signal to jump.
In order for the distributor to fire correctly, the rotor should line up with the cylinder contact at the same time the optical sensor (see picture) lines up with the break in the wheel. There are six breaks (one for each cylinder). The optical sensor is facing away from us and towards the center of the distributor.
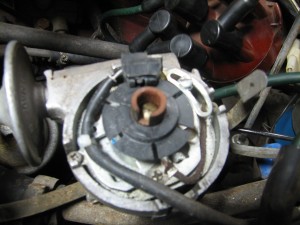 Above is a picture of the distributor from the other side (optical sensor is now at the 12 o’clock position) without the rotor. It’s a tad out of focus, but it helps to see how the breaks line up with the optical sensor. Now, let’s go back to the other side and look at one last thing.
 The picture above shows the distributor with the cap removed. We had a different rotor on at this time, so that’s why it’s not the blue one. The yellow arrows in this photo point to the adjustment available. Previously, the rotor was rotated a good 20 degrees counterclockwise (yellow arrow “Prior Position”) from where it is now, which resulted in it being a good ways past the dot marking the number one cylinder contact. Since everything didn’t line up like it is supposed to, the spark was weak.
Weak spark or not, the car ran fine for a while, a testament to the strength of the ignition. Eventually, however, running at over 3000 r.p.m.s for an extended time caused one of the spark plugs to go bad, which caused the miss Chip was hearing.
Credit for help in the diagnosis goes to Jeff Schlemmer of Advanced Distributors. Chip has sent numerous distributors to Jeff and has been very pleased. Jeff commented that he has seen phasing effects increase in prominence with the advent of electronic ignition retrofits to older cars. Jeff is a wealth of knowledge and well worth a call if you need a distributor resource.
So here’s the bottom line: when all of the ignition components weren’t lining up correctly, it caused problems with the ignition (bad plug) that led to a miss. Once Chip corrected that, the car runs like a top… which is what we’re after. Now that the car is running well, we can experiment with the effects of advancing the timing to 12 or 14 degrees BTDC. We’ll keep you updated.

